• Skip to primary navigation
  • Skip to main content
  • Skip to primary sidebar
  • Skip to footer

Training4cyclists

Cycling Training Tips

  • About
  • Cycling Training Programs
  • Case Studies
  • Cycling Training Tips

cycling

10 Steps to Achieve Better Results with Interval Training

July 26, 2012 by Jesper Bondo Medhus 2 Comments

Interval training is often mentioned as the key to successful cycling training. Interval training is a cornerstone in all my training programs and I believe it is the most time effective way to achieve great results. Here is a list with 10 tips that can rapidly improve your interval training:

1.High priority to your interval training

First of all you must decide that you really want to do interval training. It might sound obvious, but if you give high priority to your interval training, it’s also much more likely to become a success. Try to perform your intervals as the most important part of your ride. Prioritizing interval training means that it is more important for you to perform your intervals than e.g. getting your planned distance, joining a social group ride or even participating in a race.    

  • Key Principles of Solid Cycling Training.

2.Schedule your intervals

When you have decided to perform you interval training, it is a good idea to make a crystal clear plan for your interval training. You (and your training partners) must know exactly what is going to happen when the interval training begins. Intensity, distance and recovery should be well defined in a way that everyone understands. There should be no need to ask questions during the interval session.

3.Have a goal

When you perform interval training, you will often try to pace yourself through high intensity efforts that require a high amounts of mental power. If you have a goal with you interval training like a specific race (e.g. a time trial) you are training towards, it is a lot easier for you to go through the difficult parts of the training.

4.Warm-up before interval training

Warming up before interval training should be a no-brainer. Metabolic processes are temperature-dependent, thus many enzymes perform better at higher temperatures. Oxygen transport from blood to tissue is more rapid. Warming up simply increases your performance and makes it possible for you to train at higher oxygen consumption.

  • How to perform a quick warm-up before interval training.

5.Use a heart rate monitor or power meter for pacing

Pacing is a discipline in itself, but heart rate monitors and power meters have made it easier than ever before to pace yourself through an interval session. There is a steep learning curve and many positive experiences with both kind of monitoring.

  • Introduction to Power Meter Training
  • 5 Steps for Better Heart Rate Monitor Training

6.Active recovery between intervals

It is tempting to stop pedaling after finishing a hard interval, but it makes good sense to keep pedaling at low intensity because it helps your recovery. The recovery periods can also be used to maintain your oxygen consumption at a relatively high level and thus make it easier for you to reach high aerobic levels in the next interval.

Bottom line is you will get more time at a higher percentage of your VO2 max and that will give more stimuli for both peripheral and central adaptations.

7.Cool down after interval training

When you have finished your interval session it is recommended to perform a short cool down. If you are serious about your cycling training, this is the time where you should start your post-training recovery process. Eat proteins and carbohydrates, drink water and ride easy to boost the recovery process.

  • Post-training nutritional tips for cyclists

8.Experiment

Train alone, train with other riders, try different routes, try different bikes and naturally try a broad range of intervals sessions. The best way to get experience is to experiment with different strategies and that is also a great way to keep your motivation high.

  • Boost Your Performance with Alternative Workouts

9.Evaluate

When you have performed your interval session you must always remember to evaluate how it worked out for you. Are there any things you would like to adjust before your next interval session?

10.Share your best interval training tip!

Just to remember you about that fact that I don’t have all the answers to perfect interval training. If you have some good suggestions, please don’t hesitate to share these tips with the readers here on Training4cyclists.com. Your comments are highly appreciated!

The Magic 2 Hour Cycling Training Program

July 12, 2012 by Jesper Bondo Medhus 3 Comments

When you go on vacation it can be difficult ”“ even impossible ”“ to maintain your fitness levels. After all it is a time for relaxing and chilling out with your family and friends, so your cycling training program tends to take a back seat.

But lazing on the beach or enjoying a few holiday cocktails does not mean you have to throw your training regime totally out of the window. You can still maintain your fitness: the challenge is how to be creative with your time to make sure you achieve this…

Finding the time without compromising your loved ones can be a challenge but it can also be fun. So I have devised a training program to make sure you don’t waste all the months of hard work that you have put in while on vacation.

Here are my six steps that will make your vacation a training success:

1) Be proactive.
When you are on vacation you can’t follow your regular training program. You can’t train on your normal bike or ride your regular routes. Instead focus on the possibilities and not the limitations. Cycling on vacation can be an excellent way of discovering new places: take in the sights and sounds of your new surroundings while simultaneously maintaining your fitness. Read more about being proactive.

2) Cut down on the number of training days.
In fact, reducing your total training time may well be good for you. The optimal number of training days is three because you will then be able to tackle tough intervals in every session. If you train fewer times per week, you will not get enough stimuli for your aerobic system.

3) Decrease the length of training sessions.
When you go for shorter rides, it becomes easier to stay focused and concentrate. Consequently you will get more quality into your training and fewer junk miles.

4) Interval training.
The real secret to succeeding with a dramatically reduced training amount is highly effective interval training. By doing intervals, you will be able to get a lot of training with an intensity close to VO2 max. And that will largely compensate for the reduced training volume.

5) Use the 80/20 principle.
Focus on the things that improve your performance and leave the time-consuming tasks for later. So you should mainly focus on high quality training sessions and (for a while) forget about fine tuning and polishing your bike and shaving your legs etc. To sum up: spend the time you are away from your travelling partners wisely.

6) And don’t forget that first and foremost you are on vacation…

The Magic 2 Hour Cycling Training Program

I have boiled these tips down to a ready-to-use training program for you. Since this program is extremely time effective, I have called it The Magic 2 Hour Cycling Training Program.

MondayWednesdayFriday
40min
—
5min warm-up 5x (4+2min)
(highest possible intensity, active recovery)

5min cool down

40min
—
5min warm-up 30x (40+20sec)
(highest possible intensity, active recovery)

5min cool down

40min
—
5min warm-up 30min time trial

5min cool down

MondayWednesdayFriday
40min
—
5min warm-up 10x(2+1min)
(highest possible intensity, active recovery)

5min cool down

40min
—
5min warm-up 30x(30+30sec)
(highest possible intensity, active recovery)

5min cool down

40min
—
5min warm-up 30min time trial

5min cool down


You see? It can be done.

Have a great time on your vacation but don’t forget to find the time for my free Magic 2 Hour Cycling Training Program.

I hope you enjoy it and I wish all of you the best of luck with it.

The Ultimate Guide to Time Trial Training

September 12, 2011 by Jesper Bondo Medhus 21 Comments

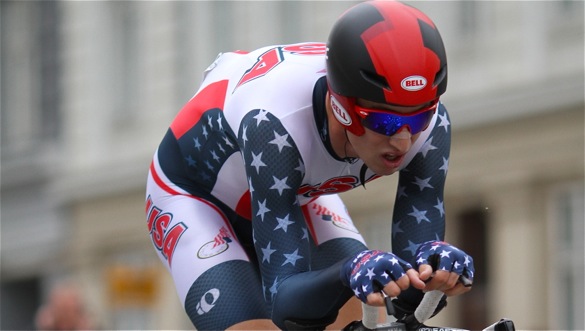
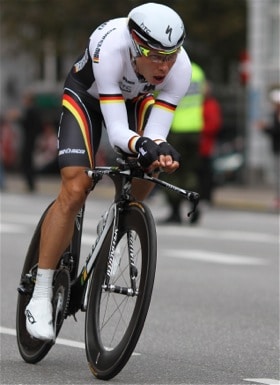
Tony Martin has perform many hours of specific time trial training.

IT SOUNDS fairly straightforward. You, your bike and the clock, riding in splendid isolation as quickly as you can, away from the rough and tumble of the peloton.

In theory a time trial should be a simple test of your ability to ride your bike as fast as possible over a set distance.

But if only it was as easy as that…

In many ways a time trial is the ultimate challenge for a rider. There is nowhere to hide, no bunching pack to drag you along. And it hurts: in fact the pain will usually last from start to finish.

But whether you achieve a personal best (or a personal worst) you will always be left with the same feeling when you cross the line: you will want to go faster next time. Time trials have that glorious habit of leaving riders hungry for more.

If you’re serious about getting faster, beating your quickest time over a particular course and completing the perfect time trial, getting every little detail right is absolutely crucial, especially with regards to pacing, aerodynamics, preparation and technique.

So before you saddle up, here is my own ”time trial bible” to give you a kick-start”…

Time Trials: Getting the pace right

The first five minutes
Pacing is everything when it comes to time trials. Getting the initial speed correct is the key to achieving your goal time. But the easy trap to fall into  and so many riders do this is to go out too hard so your pace slowly but surely slackens off during the course of the ride.

The end result? You finish meekly when you should be aiming to finish with a flourish.

Patience is the key
Starting at breakneck speed will NOT lead to a better overall time. If you blast out at full pelt you risk blowing up well before the end of the trial, which will lead to you running out of energy and finishing poorly.

So with this in mind, the first five minutes of a time trial are crucial and will almost certainly dictate if you succeed or fail in achieving your goal time.

In addition, your cardiovascular system takes a few minutes to react before it delivers optimally for your desired intensity.

Even if you’ve performed a solid warm-up, you will be at risk of going anaerobic if you try to maintain your target pace right from the beginning of the time trial.

While I strongly recommend the use of power meters to help with your pacing strategy, it is possible to learn how to pace yourself sensibly without using one.

Ups and downs of pace control
The traditional view among the majority of coaches and riders is that a time trial should be tackled by adopting a strong but even pace throughout the whole race. But I beg to differ slightly. I strongly believe that a few judicious and subtle changes to your pacing strategy will yield a faster overall time.

I stress again… it is so vital not to start too fast. Try staying SLIGHTLY BELOW your planned target power for the first five minutes of the time trial. Then after five minutes make sure you ride as close as possible to your target power.

Now here’s one difference to the ride-at-an-even-pace throughout mantra: Try pushing a tiny bit harder uphill, and then ease off slightly on the descents. Do this and you will achieve an overall quicker time.

Try it: it works!

About 20 watts more power riding uphill will save you more time than you will lose by reducing 20 watts going downhill. This is because there is a stronger aerodynamic drag at higher velocities.

When it comes to pacing, one great training tactic is to practise completing the distance you will be tackling at a flat-out pace. If you find that your speed slackens off towards the end, then you have clearly gone out too hard.

However if you feel fresh at the end then you probably haven’t paced it fast enough. Practice makes perfect, so it’s worth practising until you know for certain what a challenging but sustainable effort over a given distance feels like.

Action plan:

So when it comes to judging the right pace try the following tips:

  • Analyse your last time trial (heart rate, power outputs).
  • Develop a new pacing strategy for your next time trial.
  • Perform specific time trial training with your new pacing strategy.

*Obviously if you are taking part in a track pursuit then you will have to use a different pacing strategy.

Advanced Time Trial Training – Aerodynamics

Bradley Wiggins. Silver medal at World Championships in Time Trialling 2011. Image by Training4cyclists.com

Aerodynamics are pivotal to completing a successful time trial. But riders shouldn’t get too hung up on aeros: keep in mind that it is just one part of the overall performance equation.

Yes, aerodynamics play a big role, but they are not the deal breaker when it comes to achieving a goal time.

However some facts are indisputable: one big fact is that 90% of a rider’s power output is used to break wind resistance. In fact wind resistance is the biggest enemy when competing in a time trial.

So to counter the elements finding the optimal body position is crucial as it minimises the aerodynamic drag, so requiring fewer watts to ride quickly.

Pole Position
The position of the body is also where riders can make the biggest improvement to overall aerodynamics.

And if your bank balance won’t stretch to purchasing a dedicated time trial bike and all the expensive accessories built for brilliant aerodynamics then nurturing a good body position is even more important.

There is even a growing view among some experts that the most aerodynamic position for a rider can actually lead to a decrease in pedalling efficiency, and a rise in the metabolic rate of effort. Subsequently, this can lead to a cut in the average power output of the cyclist.This reduction in power can be between 10-20%, say some experts.

The body position can also become so extreme that it actually limits your performance even though it is more aerodynamic. However I believe that with targeted uphill training while maintaining the aerodynamic position it is possible to cut down on this loss of power caused by aerodynamic body position.

Aero Test
Wind-gallery tests are also extremely useful but are expensive. However there is one simple test to gauge the aerodynamic advantage of different bike positions.

All that’s required is a 300m descent, with a gradient to allow a 50 km/h speed without effort on the pedals, followed by an ascent to slow down and stop the cyclist within a fairly short time: the further the cyclist goes up the hill, the more aerodynamically efficient the body position.

This can take a few attempts to eradicate statistical errors, and conditions such as wind speed/air temperature have to be taken into account but, in the end, you will find the results are reliable.

In terms of body position the frontal area is the most vital aspect.

Most coaches agree that riders should try to minimise their chest’s bagginess and keep their arms and shoulders as closed as possible. Other strong aerodynamics tips include:

  • Make your aero extensions as long as the rules allow
  • Handlebar height is not as vital as reach
  • Wear an aero helmet

Get Your Kit On
The last point above is a good one. An aero helmet (app. $150) is a good place to start if you have some spare cash to splurge. There is no doubt that an aero helmet will make you significantly faster so it’s a solid investment. Experts estimate that an aero helmet alone saves a rider 10-15 watts of power at time trial speeds.

You could also try lowering the front of the bike, which could be as simple as flipping the stem, and fitting some tri-bars, which cost as little as $50. After an aero helmet, you could start thinking about adding aero drinks bottles, overshoes, skin suits, deep-section wheels. But it is wise to spend any money you have on making sure you get into a good body position first.

And while all this expensive equipment is useful, pricey kit won’t make you go faster if your body acts like a huge air brake.

So if your budget is limited, keep in mind that body position should be your main priority. Focus on improving your body position on your current bike and invest time and energy on the areas where you can make the biggest gains.

Remember: cut wind resistance and you’ll go faster.

Take action:

  • Perform aerodynamic tests with your current bike.
  • Reduce your frontal area. Make a “longer” position on your bike.
  • Perform an aerodynamic test with optimised set-up.
  • Repeat above steps until you see gradual improvements.

Interval training for time trials: No pain no gain

In cycling your training should always be targeted to your goal. So for time trials you will have to train at a very high intensity if you want to improve your time over a given distance.

To sustain a strong pace for the duration of a time trial, your training sessions need to be explosive. So interval training is the key, with a combination of sub-threshold, threshold power and VO2 max intervals.

Professional riders target their time trial training towards improving their threshold power. But developing a large aerobic engine will not happen overnight. It demands a huge amount of training and effort, and the adoption of the highest quality training principles over several years.

But one thing is certain: time trial riders (just like sprinters and climbers) do need a fantastic threshold power as a strong performance at threshold power is obligatory for winning any race. And another thing is certain: training with a very high intensity will boost your ability to continue riding without accumulating lactic acid.

VO2 Max Intervals

VO2 max intervals are a brilliant stimulus for your aerobic system. They also provide a great boost to your threshold power. VO2 max may not be the most crucial power output but the advantages of learning this skill are immense because the physiological adaptations to VO2 max training are the same as the ones you achieve when training at lower intensities.

Also bear in mind that threshold power is only a percentage of your VO2 max. The physiological skills you train with during threshold power intervals are also stimulated at VO2 max intensity.

Threshold Power Intervals

These are the most popular way to boost threshold power. The key is to know your power output or heart rate at threshold power and then use these to pace yourself throughout intervals at the same intensity. The best tactic is to tackle a time trial as a yardstick or reference.

The toughest part of these intervals is to stay at the right intensity throughout. Setting off a tiny bit too fast will make it impossible to maintain the right intensity. Starting too slowly, and you won’t benefit from the adaptations you are training for.

Threshold power intervals are extremely tough but really effective in creating a better aerobic capacity and they are brilliant for any rider want to become a better time trial rider.

Sub-Threshold Intervals

High intensity interval training is only beneficial if you complete them. So while VO2 max and threshold power intervals are the most effective ways of training for a time trial, they will be rendered ineffective and meaningless if you don’t complete the actual intervals at the required speed/intensity.

So physically and mentally you will undoubtedly achieve a better training result for a time trial if you opt for an intensity with a higher success rate. This is where sub-threshold power intervals come into their own as they can offer major improvements.

Some experts also argue that there is a physiological sweet spot as you can train at a high oxygen consumption without going anaerobic, with a positive knock-on effect on your aerobic system. So for time-trialling, they are excellent for training.

I would strongly recommend that you track your training progress using a series of physical performance tests. For example if you train for a 25km time trial then measure your average power output for such a distance in training.

But do remember that the beauty of hard interval sessions is that as you begin to increase the size of your aerobic capacity, you will also boost your power output for that distance. This will allow you to monitor your physical performance and, more importantly, separate these improvements from other improvements caused by improved aerodynamics.

One thing is for sure: the magic formula is out there waiting for you.

Take action:

  • Sub-threshold intervals, e.g. 2x20min.
  • Threshold power intervals e.g. 3x12min.
  • VO2 Max intervals e.g. 3x(3+3min).

Other top time trial tips

Food

Many cyclists with a race or time trial on the horizon see it as a perfect excuse to gorge on a mountain of food. But while carb-loading is recommended to a degree, moderation is advised when it comes to time trials. For an event like a 10 or 25-mile time trial, a meal rich in carbs, such as pasta or rice, the night before the race is probably sufficient. There is no reason to eat food high in fat.

On race morning focus on carbs again. Jam on toast is a good choice while if you prefer cereal ensure it’s low in fat and fibres. En route to the time trial, it is worth sipping an energy drink while a dose of caffeine (up to 200mg) may also be advisable. Stay euhydrated during warm up.

For a short time trial of 10 or 25 miles don’t bother with a drinking bottle as time lost sipping the fluid will outweigh the benefits of taking on mid-race fluid. After the event make sure you have a recovery drink ready.

Warm up

Failing to warm up properly will mean you won’t benefit from all those tough hours of training. One warm-up strategy is to ride comfortably for 10-15 minutes and then perform three 10-15 second bursts (not all-out sprints) with a couple of minutes of recovery in between. Slightly increase the intensity so you raise your oxygen consumption in small steps. This protects you from going anaerobic.

Aim to warm up for at least 20 minutes and there is rarely no reason to spend longer than 45 minutes. If you’re in a hurry, check out this quick warm up.

Mental preparation

While psyching yourself up may seem the obvious thing to do, staying calm is probably more important. Get too worked up and you may be tempted to go off too hard. Stay calm and stay in control of your effort. Remember if you go off too fast, there is no chance to recover.

Ride the course

Familiarise yourself with the course if possible. This really helps and makes sure there are no nasty surprises on the day. It is better to know where any killer hills (or potholes) are lying in wait. And even on well-marshalled courses, cyclists can still take a wrong turn in the heat of battle.

So do you feel motivated? Are you now ready to complete the perfect time trial?

If you have enjoyed reading this post why not share it with your friends on Facebook or Twitter?

Here is the link: http://www.training4cyclists.com/time-trialling/

Best of luck!

Time Effective Cycling Training = Success

March 17, 2011 by Jesper Bondo Medhus 11 Comments

When I launched Time Effective Cycling Training after four years of blogging, I was curious to see how people would respond to it. I know that an e-book is different from a physical book, yet it offers some advantages that you don’t get from physical books (e.g. instant delivery and no shipping costs).

Also people have the chance to get free e-mail support to maximize their performance with the training programs included. That’s a great service and a perfect option for me to develop my skills as a cycling coach.

Since this was my very first product, I wanted people to be happy. So, I decided to offer a 100% money back guarantee within the first 30 days after purchase. Many of my friends and family members warned me about offering that guarantee, because there was a potential risk that someone would just ”˜steal’ my e-book. They were wrong.

So far, less than 1% had asked for a refund. That is an extremely low return percentage on a digital product and that indicates to me that people are quite satisfied. It’s more than likely that there is a cheater among the refunds, but I don’t care.

A low refund percentage is great, but what is much more interesting to me is how well the training programs work. I have had a good feeling from several e-mails during the past months. Still, I wanted to hear more stories, because that is an important part of my learning process.

So I decided to simply ask my customers what results they have achieved with Time Effective Cycling Training. Most people have implemented several of my training techniques. They have used the very popular and extremely effective VO2 Max Booster Program and/or started on the 16 week training program.

Here are some of the great comments I received:

“I have realized that it is possible to use less time on and at the same time keep up the fitness level.”

“I have improved my Vo2max test result by more than 40 watts in just 2 months with only approx 6 hours weekly traning.”

“VO2 threshold improved from 290W to 354W after 3 rounds of the 14 day VO2 Max program.”

“Concise, practical, balanced approach to training. I Especially liked the focus on shorter workouts to develop vo2 max and anaerobic capacity.”

“The range of workouts for the intensity levels and the explanations of their effect in your training made things crystal clear. It was organized so you can select a training effort level and have reasonable expectations of power gains. Reading the book has given me the drive to try and take my training to the next level.”

“The organization, descriptions, and clarity of the presented material was outstanding. Like I said before, I couldn’t put it down and just kept reading. I think it would have a positive influence on anyone to go out there and train hard.”

“While you are training, you feel that you are doing really hard work, which is a good feeling. The program is also varied enough not to become boring i.e. short intervals, long intervals etc.”

“I did a modified version of the vo2 max booster. Over 14 days I did roughly 12 of the intervals (i was doing a lot of teaching at that point in time) and increased my 5 minute power from 377 to 404 watts at 185 pounds.”

Overall, I conclude that my first e-book has been a huge success and I’m very motivated now. I look forward to develop future products or services for you. Also I look forward to hearing from the readers when they have finished the entire 16week training plan, because that training program uses the best principles about cycling training I have learned the past 10 years.

If you want to achieve better results with less training, click here to read more about Time Effective Cycling Training.

Cycling Pedalling Frequency ”“ Fast or Slow?

February 1, 2011 by Jesper Bondo Medhus 13 Comments

When Lance Armstrong won the Tour de France back in 1999, he showed us a pedalling style with a very high pedalling rate, even in the mountains. Many experts have referred to this technique as one of the main reasons that Armstrong could beat his opponents so easily. With a high frequency it is easier to remove lactate from the legs, but it requires a high degree of special training to be able to maintain a high pedalling frequency.

What is the best cycling cadence?

For me, cycling pedalling rate has always been some kind of a controversial topic. I am not sure that is possible to change riding style significantly.

Nevertheless, I have tried to adapt some of my riders pedalling frequency to a faster one, believing that this would help them to save energy for the final parts of the races.

My conclusion until now is that it is not possible to make big changes, probably in the area of on average 0-5 rpm higher pedalling frequency. So special training at high frequencies can probably not explain why some riders are able to do it and others are not.

It is also worth to remember that a couple of riders who prefer slow frequencies also perform at world class level (e.g. Serguei Gonchar). Thus, a high pedalling rate per se is not predicting performance even among the best riders in the world. Take a closer look at the riders in the Tour de France and watch the differences.

Slow pedal rate might be a better choice

Ernst Albin Hansen, PostDoc, who is a scientist and previous elite cyclist, has been studying choice of cycling pedalling rate for more than 10 years now. In a study from 2006 he included 9 trained cyclists who rode two rides of 2½ hours at 180W followed by a 5-min all-out trial. Results: There were no significant differences, but trends showing that choosing a slower pedalling rate might be attractive.

Test setup:
Ӣ 180W, freely chosen pedalling rate (avg. 95rpm) followed by 5min all-out.
Ӣ 180W, calculated pedalling rate (which averaged 73rpm) followed by 5min all-out.

The calculated pedal rate was supposed to result in a minimum oxygen uptake.

Results
When comparing the two setups, some interesting results were found:
Ӣ Peak VO2 was lower after riding with freely chosen pedal rate
Ӣ Perceived exertion were higher with freely chosen pedal rate (7-9%)

These results indicate that riding like Armstrong might not be the answer for optimal cycling pedalling rate. If some of you think this study is interesting, you could consider trying the tests mentioned above in the gym during the winter. It is guaranteed a good workout for you.

Tell us about your experiences – Post a comment below!

Source:
1: Hansen EA, Jensen K, Pedersen PK. Performance following prolonged sub-maximal cycling at optimal versus freely
chosen pedal rate. Eur J Appl Physiol. 2006 Oct;98(3):227-33. Epub 2006 Aug 12.

  • Go to page 1
  • Go to page 2
  • Go to page 3
  • Interim pages omitted …
  • Go to page 11
  • Go to Next Page »

Primary Sidebar

E-books

Time Effective Cycling Training

12-Week Winter Training Program

Footer

Case studies and experiments

Bronze Medal at 3K Pursuit World Championships with Only 10 Hrs/Week

The Story Behind the 12-Week Winter Training Program

How to Become Stronger Without Adding Muscle Mass

How Much Does Extra Weight Cost on Alpe d’Huez?