
Here is a comprehensive post about mountain bike training for beginners by Cecilia Potts, a former junior mountain bike world champion and professional cyclist. So grab a cup of coffee and enjoy the reading. However, you may need an extra cup midway through this article; it’s pretty long – Enjoy!
Mountain biking can be a little intimidating when you’re a beginner.
If you’re anything like me, the first time I took my tires onto an off-road trail, it didn’t look anything like the YouTube videos that show up with a search for mountain biking.
My first few mountain bike experience wasn’t worth watching except for the scenery!
Instead of mastering off-road cycling on the first try, riding a mountain bike was a lot of learning from the school of hard knocks…thank goodness for the bicycle helmet!
The good news is learning how to ride a mountain bike doesn’t have to be that way. In fact, with some planning and a basic understanding of physics, your first ride can be as easy as taking a walk in the park.
Before Your First Ride
The bike. The bicycle you select — whether you rent, borrow, or buy—has done two things:
1.) It must match your skill level.
2.) It has to fit correctly.
Aaron ‘Moose’ Reichert has made a career out of helping people get into mountain biking. When a beginner mountain bike rider comes to him to get set up with a bike, they’re often drawn to the ultra, high-end mountain bikes they see in the glossy magazines.
Buying the most expensive bike before you’ve ever tried mountain biking isn’t going to make the sport easier to master. On the contrary, it will probably make it more complicated. The more bells and whistles and “higher end” your bicycle it is, the harder it’s going to be to learn the fundamental skills of mountain bike riding.
Trying to figure out how to set the rebound on your rear shock and adjust your disc brakes will take away the focus you need for learning how to stay upright when your bicycle is heading down a bumpy trail.
“The most important thing for a beginner is a properly fitted bike that’s apt to their skills. Too much bike can sometimes be a little squirrelly,” explains Moose.
It’s like giving a 16-year-old the keys to a Ferrari, and it’s just not a good match.
Beyond the bicycle, there are a couple of other things that can make or break your first mountain biking experience. Words of wisdom: Get a good helmet, make sure you like how the saddle fits your rear end, and invest in a good pair of shorts.
The helmet is one of the essential accessories that beginners often overlook. As a result, you will fall and crash at a beginner, intermediate, and even professional level. Professional mountain bike racer Jason Moeschler, who has been riding mountain bikes for nearly 30 years, says that a good helmet with a sound retention system (the way it fits and is fastened to your head) is a must for beginners. Another essential accessory is your bike shorts.
“The biggest mistake might be giving up on mountain biking because of not being comfortable on their bike. Having the proper bike position, comfortable saddle, suspension setup, and quality chamois makes all the difference.” says professional mountain bike racer Gretchen Reeves.
There are opportunity costs before going on your first mountain bike ride. And, for some beginner riders, it’s more cost-effective to buy the helmet and comfy shorts and then borrow a bicycle to see if they like the sport well enough to buy a bike.
There’s nothing wrong with getting a loaner bicycle, but Moeschler cautions before you do take it out, make sure it has been looked over by a bicycle mechanic so that it’s properly tuned.
Mountain Bike Training – Your First Ride
The term ‘mountain biking’ is a bit misleading because ‘off-road cycling’ is really what it is.
You don’t have to inch your way up to the top of a steep precipice or barrel down the side of a mountain to go mountain biking. And, when you’re first getting started riding a mountain bike, it’s better to build the skills you need in a less intimidating environment.
Choose a trail that doesn’t include dynamic terrain and altitude changes. Finding the right path for you can come from talking with friends who are mountain bikers and asking for advice from your local bicycle shop.
Many Internet resources can direct you to nearby trails and provide ratings regarding their difficulty.
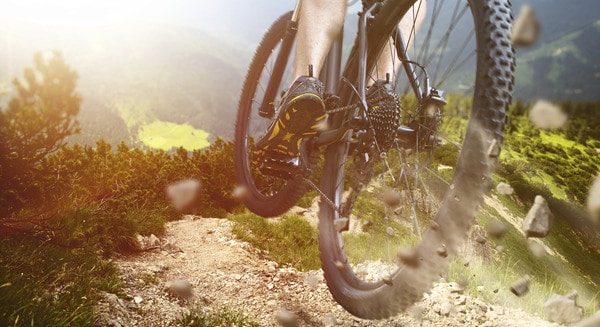
Getting into mountain biking can be frustrating because it’s not like riding a bicycle on a paved surface. Off-road cycling includes the added difficulty levels of uneven surfaces, unmovable objects (trees and rocks), and nature—like puddles, streams, and trails.
If you’re used to going out and riding 35KM on the road bike, plan on half the distance on the mountain bike taking twice as long. The point is, even if the trails you first choose to ride on are short 5KM or 10KM loops, it may take more than an hour to cover that kind of distance because of those added levels of difficulty.
Unfortunately, there’s no secret formula for your first ride.
It’s basically a trial by fire.
I wish I had better news for beginning mountain bike riders. However, there is a good and highly-scientific method used to measure the success of your first, second, third, 19th, 443rd, and 999th ride…
How many times did you smile?
It’s that simple. No matter how frustrating it was feeling like the little metal ball in a pinball machine as you were banging along the trail, at some point, you’re likely to have cracked a smile.
That moment when you were able to pedal up and over a steep incline without putting your foot down, or when you blasted through the stream crossing without ending up going for a swim; those little successes are huge confidence builders and make all the pain and anguish (trust me, there will be pain and anguish) 100-percent worthwhile.
Even though the smiling part is severe, there is a little bit more to help you have a successful first ride.
Basic Mountain Bike Skills
Two skills will make your first mountain bike ride go more smoothly:
1.) Braking.
2.) Shifting.
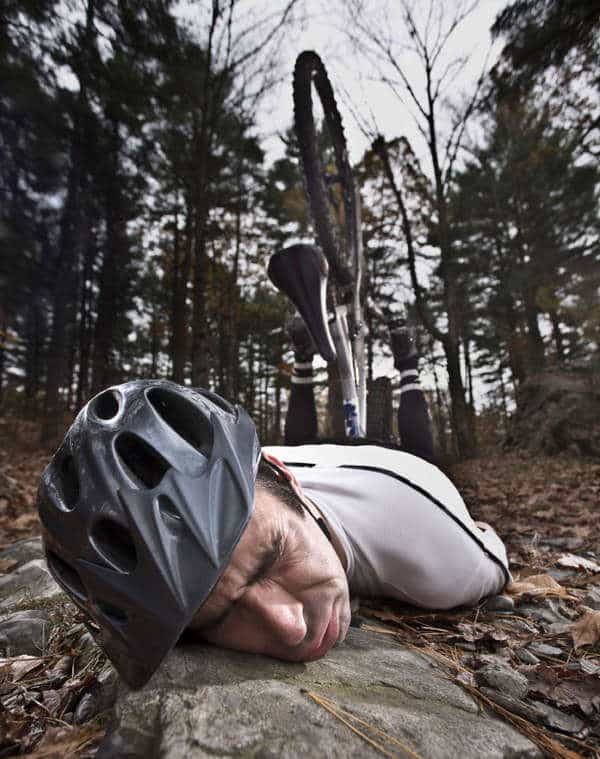
Braking. It’s intuitive to lock up the brakes when we’re in a dangerous or confusing situation. We do it on our road bicycles, we do it in our cars, and you will do it on a mountain bike. Locking up the brakes and skidding is almost always the first stage of a crash scenario.
Here’s how it plays out: too much speed, obstacle sighted, undeveloped skills to handle obstacle, too much brake, uncontrolled skid, tires lose contact or traction, the rider goes down.
The entire crash and burn scene can be omitted from your first few rides if you learn a.) to control your speed, b.) when to brake, and c.) how to brake.
Speed control is just as important when going fast as it is when going slow.
When you’re going down a hill or grade, you will gather speed. Going fast can be fun, and it probably will make you smile, but how you handle it is critical. When you achieve terminal velocity, you’ve missed the golden opportunity to brake (without potentially breaking yourself) effectively.
A good rule of thumb is when you catch yourself thinking or saying, “Whoa, that’s a little fast,” it’s time to put on the brakes and slow that train down. Notice the word ‘brakes,’ as in plural.
Your bike has two brakes, a front and a rear. You need them both.
If you grab a handful of just the back brake, you’ll start skidding and likely going sideways. Not only is this dangerous for you because of the risk of losing control and crashing, but it’s also incredibly damaging to the condition of the trail.
Skidding on a trail can cause a rut to develop and ultimately lead to trail erosion. The opposite of using just the rear brake is using only the front brake. Bad idea.
YouTube search the term “mountain bike endo” and watch the results of going all-in on the front brake only. The sweet spot for braking is using some of both the front and the rear brakes.
“When you go in for a brake job on your car how many times do you do your need rear brake pads? It’s almost always the front. You do your front. Seventy percent of the car’s stopping power is handled by the front brakes. A mountain bike is no different than a car,” explains Moose.
Shifting. Your bike has gears; use them. So many times, when we’re learning how to ride a bicycle off-road, we focus so intently on keeping the bike upright that we forget about making it easy for us to pedal the bike forward.
Unless you’ve chosen a single-speed bike for your first mountain bike, you’ve got a whole mess of gears to help you keep pedaling as you go up and over hills and through rocky or sandy stretches of trail.
People talk about low and high gears when riding their mountain bikes. You might hear a fellow rider say, “I rode that steep uphill section in such a high gear and crushed it.” High gear, uphill, crushed it. This guy must be a mountain biking master.
Sounds good, right? WRONG.
This guy made the task-at-hand way too complicated at the expense of his knees.
Remember this: a ‘high gear’ equals the chain on the smallest cog on the rear wheel, which means you’ll be making fewer pedal revolutions. So yes, it gives you more torque in a situation, but it also makes it feel not easy to pedal. Like you have to force your weight onto the pedals to get the wheels to turn.
When you encounter a steep or an uphill section, shift your bike into a ‘low gear.’ In other words, the chain should be on the biggest cog on the rear wheel. This is going to allow you to turn the cranks more easily and do what people mean when they say “spin up the climb.” Your legs will be spinning the cranks faster than the bike is rolling forward, but you’ll be able to make it up the climb without taking your feet off the pedals.
Shifting your gears is all about timing. The better you get at shifting, the more efficient you’ll be on the trail. Don’t be afraid to try out different gears on the trail. It will take a while to hone the combinations that work best for you.
It’s a good idea to ride your mountain bike a few times on a surface you’re comfortable with before taking to the trail. For example, go around the block or on a paved path and practice shifting and braking. Learn what it feels like to shift your bike.
Experiment with the brakes. Try changing gears on a small hill.
You have to pedal to shift the bike properly, and there’s a sweet spot of power from your legs that will help shift the bike smoothly without jamming the gears.
The BONUS third skill is balance.
Balance. It’s hard to learn what balance on a bicycle means just by reading about it. But, in a nutshell, balance is all about where your body’s weight is on the bicycle at all times.
The best way to think about balance on a mountain bike is to think of the bicycle as the lever and your body as the fulcrum. As the terrain shifts or obstacles are encountered, it’s up to you to keep the bike upright. Riding a mountain bike is a very active activity. It requires you to constantly shift your weight forward, rear, and side-to-side.
Going down a hill, you’ll want to move your body weight aft on the bicycle.
This means taking your rear end off the seat and moving backward. By doing this, you’re removing weight from the front wheel, which will allow you to more easily roll over bumps without getting pitched forward off the bike.
Think of it this way, if you’re going downhill and you have too much weight on your front wheel, it’s possible that when you hit a bump, your front wheel could stop short, and your inertia will cause you to continue forward sans bicycle.
Going up a hill, you want precisely the opposite stance. You’ll want to scoot forward on the saddle (yes, the skinny part of the saddle will be uncomfortably personal with your butt) or stand up while using your body weight to keep enough traction on the rear tire so it doesn’t spin out.
If you don’t do this and just keep your butt on the saddle, the front wheel will do a sort of ‘pop-a-wheelie’ behavior, and you’ll go over backward.
“I tell beginners that on hills, you’re always off the saddle in the attack position. You’re a wrestler, you’re a ninja, you are ready to attack! If you are stiff on the bicycle your body can’t receive the jolts,” says Moose.
And, when you’re body’s stiff on the bicycle, you can’t balance as well.
Lateral balance is a little bit more of an intermediate concept but still an important one to be aware of when you’re first learning how to ride a mountain bike.
Think of orange-barrier cones set up tightly in a straight line. Your job is to weave your bicycle through the cones in an s-shape pattern. How are you going to do that without falling over? Easy, you will move your body from right to left as you slalom through the cones.
The same goes when you’re riding along on a skinny section of single-track trail that’s lined with the occasional tree. Lateral balance and movements with your body keep the bicycle upright and moving forward.
Braking! Shifting! Balance! No problem, piece of cake. You’ve got this. Go out for a ride, then read the next section.
Tips and Tricks
Nobody likes to make a mistake. That’s probably why you’re reading this before you go out for that first ride. You want to know if there are common pitfalls—preventable incidents—that you can be aware of before it’s too late.
How to prevent mountain bike mistakes
Take a skills clinic and learn from riders who are better than you.
Even the pros do it, self-included (I’m a retired professional racer). A couple of years ago, I was having the hardest time making it through this 25KM downhill without having to stop. I practiced alone for days and kept making the same mistakes and not progressing.
An opportunity came up for me to ride the course with mountain bike enduro racing legend Mark Weir and world champion downhill racer Brian Lopes, and I went out with them. They opened my eyes to ways to ride the sections I was having problems with that I’d never even considered. The result was a close to flawless ride my next time on the course and a new set of skills to apply to the next time I came to a downhill section that I couldn’t figure out.
Both professional racers, Moeschler and Reeves, agree that skills clinics and following someone who’s a better rider than you can improve your skills quickly.
“What really helped was riding with people who were better and more experienced than me; this is true for both climbing or descending. Following someone who knows what they’re doing really helps with understanding form and positioning on your bike relative to the terrain,” explains Moeschler.
Reeves adds, “I typically see huge improvements in the one and two-day camps that I have taught. It improves confidence and makes it that much more fun!”
Taking the Next Steps: Equipment
In the Before Your First Ride section, the topic of equipment was discussed. Getting the right bike. Getting a good helmet and a good pair of shorts. After you’ve been out on the mountain bike a few times and you enjoy it, there are a few more pieces of equipment (and skills) that will help you be a better rider.
There are four pieces of mountain bike equipment to put on your shortlist:
1.) Eyewear
2.) Gloves
3.) Water
4.) Repair kit
Next to the helmet, eyewear—sunglasses or clear lens glasses—are the most important piece of safety gear when riding a bicycle. You will likely encounter tree branches, flying rocks, dust, and bright sunlight while out on the trail.
Getting slapped in the face by a tree branch will induce the natural reaction of shutting your eyes (don’t do that! you can’t see the trail then!), but if you have a protective lens covering your eye, there’s a greatly reduced chance that your eyes will be injured. Even simple dust is a problem.
Trust me, and you’ll be covered by it if you’re riding anywhere that’s dry. Mud, too. Mountain bike tires have a great way of flicking mud and rocks up into your face. My personal preference is to have an eyewear system that allows me to change my lenses depending on conditions. Tinted for bright light situations. Yellow or amber for low light situations. And sometimes clear.
Mountain biking is said to be tough on the legs. It’s tough on the hands, too. Much worse than if you’re just riding your road bike or city bike around. The uneven terrain causes a lot of jostling of the handlebars. You’re going to be hanging on to those bars. All that movement causes friction between your palms/fingers and the rubber handlebar grips.
A pair of good-quality gloves can greatly reduce the blisters that friction can cause and offer your palms some padding.
There are a lot of choices when it comes to gloves. Long-finger, short-finger, padded, no pad…the list goes on. Over the years, I’ve moved to wear a long finger, dirt-bike style glove. I choose a long finger glove because of its protection. My hands are covered with scars—reminders of being an athlete for more than 20 years. Long-fingered gloves keep the skin on my hands out of harm’s way. I don’t have second thoughts about heading through a brush that might scratch my hands or worry about scraping up my palms if I do go down in a crash.
Keeping hydrated while riding is really important. Moose says to invest in a water bottle. That’s sound advice, and these days the water bottle has been taken one step farther with the water bladder backpack. Riding with a gear pack that contains a bladder kills two birds with one stone.
First, you have a huge reservoir of water with you—more than you could ever carry with just a water bottle. Second, you have a gear pack, an easy way to carry just about anything, including tools to fix your bike when it breaks. Eventually, you will have a breakdown.
Simple bicycle repair is a skill that all riders must learn. Unfortunately, there are no bike shops out along the trail. I’ve checked for them already and learned that eventually, you need to know how to fix a broken chain, change a flat, and make adjustments to your bicycle all on your own.
You don’t need to carry an entire shop in your gear pack or seat pack, but bringing the following items will give you peace of mind and not leave you to walk back to the trailhead: spare tube, small pump, tire levers, multi-tool that includes a chain tool, and a little bit of duct tape.
If you don’t know how to fix a flat tire, learn from someone and practice. If you don’t know how to fix a broken chain, learn from someone.
And finally, there’s the duct tape. I keep a section about as long as my forearm is wrapped around a tire lever. I’ve used it to temporarily ‘fix’ broken saddles, fraying cables, and torn bicycle shorts (that was an embarrassing crash). I’ve also used it to connect a makeshift splint to my ankle and finger after a crash. Duct tape isn’t going to make your ride better, but it can help you make it out of the woods before dark and allow you to finish your ride.
Mountain biking is a sport that beginners can become proficient at quickly, and it’s a sport that provides ongoing enjoyment and opportunities to improve for years to come. I hope you enjoy your new sport and welcome any questions you might have.