• Skip to primary navigation
  • Skip to main content
  • Skip to primary sidebar

Training4cyclists

Cycling Training Tips

  • About
  • Cycling Training Programs
  • Case Studies
  • Cycling Training Tips

Equipment

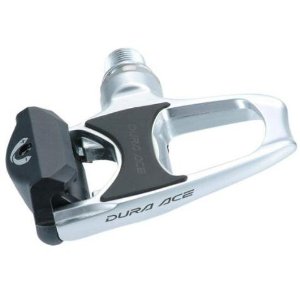
Buying Road Pedals? Consider Weights and Prices

August 22, 2010 by Jesper Bondo Medhus 5 Comments

Road pedals are not just road pedals. They add grams to the overall bike weight and thus play a role in your overall performance. You might have read about my little experiment to find out how much extra weight costs on Alpe d’Huez, which shows that even small weight savings make a difference. Thus, it is worth considering bike components’ weights when you spend money next time.

Choosing new road pedals is not always an easy job. There are several things to consider, and two major concerns are prices and weights. There are some quite significant savings for your wallet and bike weight if you look at the scheme below:

Professional Road Pedals

 WeightPrice
Shimano Dura Ace PD-7900 Carbon Pedal318g$229
Look KEO Blade Carbon Ti Pedal258g$499
Campagnolo Record Ti Pro Fit Plus Pedals336g$300
Speedplay X/1 Titanium Road Pedal234g$329
TIME RXS Titanium Carbon Pedals265g$359

Semi-Professional Road Pedals

 WeightPrice
Shimano Carbon Ultegra PD-6700C335g$149
Look KeO Sprint Pedals. White328g$180
Speedplay X/5 Road Pedal290g$125

Beginner Road Pedals

 WeightPrice
Shimano 2010 105 SPD-SL Road 392g$89.95
Look Keo Easy370g$69.95

All listed weights are Total weight (Pedals incl. cleats).

Please note that the links above are all pointing at Amazon, which means that Training4cyclists.com receives a small payment if you click the links AND buy your cycling equipment through these links.

As I have written previously, every single gram saved is an advantage on the climbs. Naturally, it must not negatively affect the riding performance, but I have never heard of a rider having troubles with lightweight road pedals. Thus, if you have decided to reduce your bike’s weight, the above links could be an excellent place to begin.

Review: Continental Grand Prix Supersonic

October 7, 2009 by Jesper Bondo Medhus 1 Comment

Continental Grand Prix Supersonic

Continental Grand Prix Supersonics are incredibly lightweight tires that might be interesting to use at time trials or criteriums. Supersonic 23mm tires weigh only 155g, and that is so low that I thought it was worth taking a closer look at them. Light tires lower the overall weight and improve cornering significantly (softer materials means better grip).

Why you should buy Continental GP Supersonic

The performance is absolutely world-class. These tires are extremely fun to ride. When you corner with Supersonics, you will feel an incredible good grip. That is the best thing about the Supersonics and what surprised me most. If you look at a formula 1 race, you will see the same picture. Soft tires give the F1 pilots the best possible grip, but these tires have to be changed one or two times during the race.

Lightweight components are always attractive. I have previously shown what additional weight can do on your finishing time during climbing. It’s great to know that you use lightweight components, but it’s impossible to feel a weight saving of 120g. Still, you might very well make a significant difference in your performance.

Why you shouldn’t use Continental GP Supersonic all the time

Extreme optimizing weight and rolling resistance mean a higher risk of punctures and a shorter lifetime of tires. That is absolutely a serious reason to give it an extra thought before you mount Continental GP Supersonics. I think the Supersonics can be ridden for app. 5-700km depending on road conditions and your body weight.

Conclusion
Continental GP Supersonic is the perfect lightweight choice for time trials and criteriums. Use them at special events and accept the higher risk of puncture. It is pretty challenging to find these tires, but there is now a newer version for time trials available with almost the same advantages as mentioned above. You can purchase fast tires from Continental GP here.

Polar s810 Protects You From Overtraining

September 22, 2009 by Jesper Bondo Medhus 10 Comments

Polar s-810 heart rate monitor

Polar s810 can measure your heartbeat intervals. The differences in these periods reflect your autonomic nervous system when it regulates your heartbeat. This measurement is most useful at rest or low intensities, because we are talking about tiny differences (msecs.) Your relaxation rate indicates the state of your physical recovery. If you are overtrained, it might very well be reflected on the Polar s810 monitor.

Polar s810 agrees with clinical ECG

From a clinical perspective, you will typically use an electrocardiogram (ECG) to measure the differences in length between each heartbeat. This is called the R-R interval, referring to the time between two R waves in the ECG. You don’t have to understand what these waves mean, but if you have a particular interest in this topic, there is an explanation here: electrocardiogram.

Heart rate monitors can protect you from overtraining

Polar s810 provides valid measurement of the R-R intervals and calculation of the heart rate variability compared to ECG. This variability can be used as a sign of health and recovery level. I think it is interesting that a heart rate monitor can provide such precise info because it allows you to notice when you need more rest before the following training schedule. Thus, it can protect you from overtraining. In theory, there should be a correlation between the state of physical recovery and your heart rate variability, and it is also concluded to be true in a couple of scientific studies.

If we look back at the last decades, there has not been much progress in heart rate monitors: They showed the heart rate and stored some data in files (and not much compared to other digital things these days). So introducing precise details like Polar s810 is interesting. Hopefully, Polar watches will get competition from other products, so more helpful info will make our bike training more scientific.

Which Heart Rate Monitor is the Best for You?

July 6, 2009 by Jesper Bondo Medhus 1 Comment


Buying a heart rate monitor doesn’t have to be expensive. A cheap heart rate monitor might very likely be one of the best investments in your cycling career.

If there was a performance-improving per money index, I guess a heart rate monitor would rank in the top. It is possible to buy quality heart rate monitors like Polar or Cardiosport for reasonable prices. Several copy products have a high performance and might save you a few bucks.

Basic heart rate monitors

All companies producing heart rate monitors have some basic models made for beginners. These watches have a minimal amount of detail but are delivered at a very fair price. Measuring heart rate is very accurate at basic heart rate monitors because they use the same techniques for measuring as more expensive models do. These watches measure the current heart rate, and that is it.

If all you want to know is the current amount of beats, a Polar Basic heart rate monitor could be a good choice for you. There are also some other basic models which offer a few options like target zones or average heart rate. Especially the avg. Heart rate can be helpful, exciting and motivating to use during training. However, I think that these options are an absolute minimum for a serious cyclist.

Advanced heart rate monitors

If you want to get more details and options about how your heart performs during the training session, you will have to invest in an advanced heart rate monitor. Here you will get more details about your performance, and the monitor will store more data for you. E.g. how much time you have spent above your target zones.

Some of the monitors in this category can be connected to a computer so you can make graphs of your training sessions. This can be very enjoyable for some people and very useful for others. However, the amount of data stored on these monitors is often limited, especially when compared with how much data you can keep on an iPod or MP3 player.

For some reason, heart rate monitors have not taken part in this development. In many ways, heart rate monitors are old fashioned, probably because of very few competing manufacturers. For example, for many years Polar was the only reliable heart rate monitor on the market. Nowadays, competition intensifies, which makes the heart rate monitors both better and cheaper.

Professional heart rate monitors

If you have a scientific approach to your cycling or want to get all details registered, you have to buy one of the professional heart rate monitors. These watches store vast amounts of data. Actually, they can keep every single beat from your heart. This makes it possible for you or your coach to make some very comprehensive analysis of your training on your personal computer. But, of course, to get the total value out of a professional heart rate monitor, you need to have some interest in exercise physiology.

How To Optimize Your Aerodynamic Position Using a Power Meter

May 14, 2009 by Jesper Bondo Medhus 5 Comments

If you are a time trialist or triathlete, one of the benefits of using a power meter is optimizing your aerodynamics. A better position on the bike supplied with aerodynamic equipment can help you to save seconds or even minutes in a time trial.

Now I will show how you can use a power meter to optimize aero position on your bike through a simple testing procedure.

Wind tunnel aero testing: Gold standard but expensive

Wind tunnel tests are referred to as the gold standard of optimization of aerodynamics.

These wind tunnel tests are expensive, and therefore we only see professional riders use these tests to optimize their position on their aero bikes. Therefore, logically, professional riders have a significant advantage in doing wind tunnel testing. However, often it is only the classement-riders who get the chance to do these tests due to the high cost.

Don’t worry, here comes the good news. A power meter can help you optimize your aerodynamic position without ever visiting a wind tunnel or spending extra money!

Power meter: Great performance and affordable

If you are the lucky owner of a power meter like SRM or PowerTap, you can perform your aerodynamic tests. It’s essential to have a precise measuring of power output.

Currently, I think SRM and Powertap are the two best power meters on the market. Using cheaper and less precise power meters is not recommended. If you don’t have a power meter, buy one or try to borrow one.

A power meter is the single best investment for a serious rider who wants to improve performance. It enables you to perform aerodynamic testing, precise analysis of power output in races and training situations, and a solid training partner/coach makes the power meter an easy choice.

Best of all, the power meter presents objective data that are not influenced by weather, hydration, stress, or any of the many parameters that affect your heart rate.

Use a power meter to optimize aero equipment

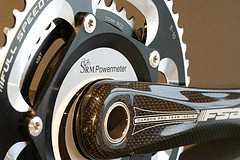
Maybe you remember how I used a power meter last summer to investigate how much bike weight costs on Alpe d’Huez? The U23 rider who performed these trials had to maintain a power output around 275w on all four rides up Alpe d’Huez. The test bike was a Pinarello Prince equipped with Shimano Dura-Ace and SRM crank.

Afterwards, I could compare the finishing times to see what you pay if you carry extra weight. Of course, you can make more precise trials than we did here, but it shows the principle of using a power meter to optimize your equipment.

Thus, after these trials, we had a picture of how much weight matters in the Alps.

When you ride up Alpe d’Huez, aerodynamics don’t play a significant role because you ride relatively slowly. However, the speed is much higher in time trials, and many serious riders perform average speeds above 40km/hr.

Thus, optimization of aerodynamics should be the primary concern if you want to improve performance without struggling with your threshold power.

Find a good location

You will need a circuit to ride fast and maintain a constant speed/power output. This is best done on a velodrome.

The main principle is to eliminate everything unrelated to aerodynamic drag. That is why wind tunnel testing of cyclists has become the golden standard procedure. Nevertheless, outdoor testing is still necessary because you will compete when you race (corners, small hills, etc.)

If you don’t have a velodrome in your neighbourhood, then you have to be a little creative to make a good course for your tests. It’s still possible, but more factors can influence your ride. Though, it gets more challenging to show minor differences.

Write a protocol

Write down all the tests and numbers you want to collect and in which order. For example, that could be the different aerodynamic materials you would like to test or different body positions on your bike.

It’s a good idea to start with a standard upset of your bike, e.g., Standard frame + standard equipment + standard body position. Then, when you want to test different setups, change only one parameter at a time. Otherwise, it gets difficult to identify what setup change resulted in reduced aerodynamic drag.

Make two rides of 1-3km with each setup. The more rides you do, the better chance you get to show a minor significant difference.

Constant power output method

When you ride on a flat road with constant power output, differences in speed are primarily due to your aerodynamics. Therefore, if you decide to use the continuous power output method, you must keep your power output as constant as possible and your desired aerodynamic position on your bike.

When you have finished one lap on your circuit, notice your average speed and power output. Hopefully, you get power outputs so close to each other that differences in average speed can be accepted due to altered aerodynamics.

Constant speed method

When you ride on a flat road with a constant speed, differences in required power output are primarily due to your aerodynamics.

If you decide to use the constant speed method, you have to keep your speed as steady as possible and keep your desired aerodynamic position on your bike. As you can see, this method is much the same as the constant power output method.

The difference is that you try to keep average speeds so close to each other that any difference in power output can be considered due to altered aerodynamics.

Constant power output or speed?

Decide whether you use the constant wattage or constant speed method. Both are suitable methods, but I will choose the constant speed method if I have to pick one. I recommend it because it gives you the possibility to use an iPod in your ear to keep a steady pedalling frequency.

When you’ve found the right gear combination, this little trick makes it easier for you to ride at the decided speed in all tests. You follow the rhythm from the music like when you are at a spinning lesson. Thus you can concentrate 100% on holding your aerodynamic position on your bike.

Riding at speeds close to your race speed is the most optimal since you can see how many watts it’s possible to save. There is, however, a slight risk that the workouts with standard setups can become quite hard intervals. This will not happen with the constant power output method.

If you use the constant power output method, there is a risk that you lose focus on holding your aero position. The positive thing is that the result is directly shown as increased speed/saved seconds.

Thus you can immediately see how much faster you will go if put on, e.g., an aero helmet instead of your standard helmet.

Collecting data

It’s a good idea to have an assistant help you, for example, your cycling coach, a friend, or a family member, to keep track of the data stream. Assistants can be helpful throughout the whole process.

As I said previously, we need data from two rides with each setup close to race speed. Doing tests with a distance of 1 to 3km gives you a fair chance to notice significant changes in aerodynamics.

I recommend doing more of these tests instead of more extended tests because weather conditions might influence the results (temperature, changing winds).

It is also recommended to do a few tests at lower speeds, e.g., 80 and 90% of race speed. This increases the power of your data and gives you the chance to spot trends at an early stage.

Analysis of aerodynamics

This is the exciting part of this process since you find out what works for you. You will be amazed how much time you can save with an optimized body position on your bike. Also, you have the chance to figure out how much time can be saved if you use a rear disc wheel.

Remember to look at material and body position savings because they can add up. I know it is expensive to buy aero gear for your time trial bike, but you can find out where you get the best value (watts or seconds) for money using the principles above.

Share power meter data

Feel free to share your experiences with the readers here at Training4cyclists.com. If you have some interesting observations, let us hear about them. How many watts did you save using the principles described above?

Conclusion

There are many benefits of using a power meter. It enables you to do aerodynamic testing without extra cost and offers a suitable alternative to an expensive wind tunnel test.

Aerodynamic tests using a power meter can help you optimize your aerodynamic position on your time trial bike or select the right combination of aerodynamic wheels/frame/helmet, etc.

Next Page »

Primary Sidebar

Getting started

Recommended Bike Equipment

The Ultimate VO2 Max Training Session

Time Trial Training - (best practice)

Jesper Bondo Medhus

Jesper Bondo Medhus, author of Training4cyclists.comAbout Jesper

Email Updates

Facebook

Youtube

E-books

Time Effective Cycling Training

12-Week Winter Training Program